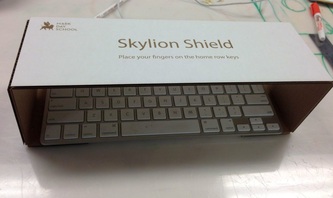
The finished product.
One of the tenets of the maker movement is the idea of rapid prototyping: being able to conceive of, design, fabricate, and test a product in a short amount of time. This is made possible with new technologies such as 3D printers and laser cutters.
An example of rapid prototyping occurred after I taught a lesson on keyboarding and a student was finding it challenging to keep his fingers in the correct "home row" positions instead of "hunting and pecking" to find each key. When the teacher asked what I would suggest in that situation, I replied that a keyboard "shield" or cover helps students. A keyboard shield is a long piece of material (often cardboard or acrylic) that shields students' eyes from the keys but still allows them to press the keys. The idea is that it's next to impossible to "hunt and peck" without visual confirmation but that using the correct finger replacements doesn't require seeing the keys. Using a keyboard shield early on in keyboarding practice can allow a student to become comfortable and proficient at typing.
In prior years, my options for providing keyboard shields were between several vendors who shipped expensive cardboard pieces that would easily break with regular use. Add to that the fact that our students learn to keyboard on iPads using smaller (width) keyboards than the keyboard shields are designed for and the fact that some manufacturers don't make products that easily fold for storage and the best solution becomes clear: create our own product in-house.
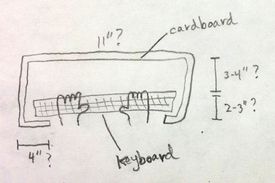
I sketched plans for a keyboard shield and included my best guesses for dimensions:
An example of rapid prototyping occurred after I taught a lesson on keyboarding and a student was finding it challenging to keep his fingers in the correct "home row" positions instead of "hunting and pecking" to find each key. When the teacher asked what I would suggest in that situation, I replied that a keyboard "shield" or cover helps students. A keyboard shield is a long piece of material (often cardboard or acrylic) that shields students' eyes from the keys but still allows them to press the keys. The idea is that it's next to impossible to "hunt and peck" without visual confirmation but that using the correct finger replacements doesn't require seeing the keys. Using a keyboard shield early on in keyboarding practice can allow a student to become comfortable and proficient at typing.
In prior years, my options for providing keyboard shields were between several vendors who shipped expensive cardboard pieces that would easily break with regular use. Add to that the fact that our students learn to keyboard on iPads using smaller (width) keyboards than the keyboard shields are designed for and the fact that some manufacturers don't make products that easily fold for storage and the best solution becomes clear: create our own product in-house.
I sketched plans for a keyboard shield and included my best guesses for dimensions:
I then used a piece of scrap cardboard to fold an early prototype for initial testing:

The shield was too low and not sturdy enough to stay in place while typing but it gave me a sense that I was on the right track. Next, I measured an actual keyboard that students use and sketched a new model:
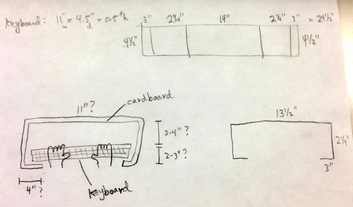
Using Adobe Illustrator, I drew the model using vector lines (required for laser cutters) in the exact measurements I had taken, adding a little for space around the sides and top of the keyboard. The resulting model would fit on a piece of 24"x6" cardboard which was good since the laser cutter bed is 24"x18". Any longer and I couldn't make it from a single piece of cardboard.
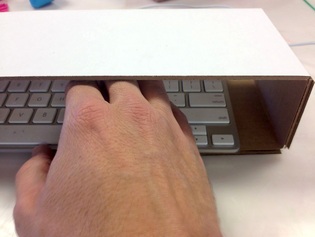
I "printed" the model to the laser cutter and watched while it cut and scored the lines I had drawn. The second prototype was sized well but did not provide enough room for my hands to type comfortably:
I "printed" the model to the laser cutter and watched while it cut and scored the lines I had drawn. The second prototype was sized well but did not provide enough room for my hands to type comfortably:
I increased some of the dimensions in Illustrator and decided to add text that would be engraved on the cardboard using a low-power setting on the laser cutter. I also added a Mark Day School skylion and some instructional text. I "printed" the third prototype:

This worked great! The cardboard is sturdy and the height is perfect for my hands. The whole process took me about half an hour and our students don't even have to wait for the product to ship from a vendor. I gave the product to the students' teacher for testing by her students. It's great to know that any modifications they need can be quickly and easily made. I'll post an update soon with the results.
For many of our projects in the Open Lab, this is roughly the process that we would like to introduce to students. We think the ability to rapidly prototype, test, and re-design will be exciting for students.
— Tatian Greenleaf

 RSS Feed
