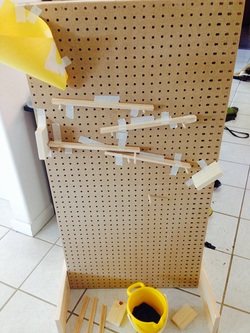
Using these instructions from the Exploratorium, I built a marble run peg board. We're hoping to use these with students in the Open Lab this year.
 |  |
Here's a video of my son explaining how it works and demonstrating a run:
The first version worked fine but I learned a few things from the process:
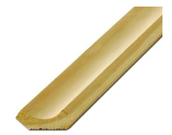
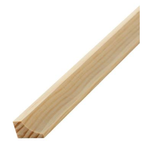
1. The cove moulding I bought fits a marble but the bottom of the wood is a V shape and doesn't balance well on the pegs. I had to use a lot of masking tape to keep everything together. At the Exploratorium, they had carved out grooves for the pegs to fit into on the bottom of the moulding but they also used flat-bottom moulding.
This: Not this:
 |  |
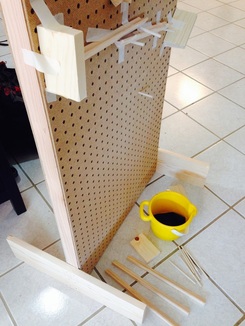
2. Using a rectangular base (1"x6"x20") is steady, especially with the 1/4" "proud" overhang, but it's a tripping hazard. I'll definitely make the triangular base next time.
3. Even though I measured the spacer wood carefully and cut it carefully, it didn't fit together well at first. I had to shave off some and even wood glue some shims to make everything fit tightly together and fit within the dimensions of the peg board.
4. The peg board from Home Depot was white on one side so I placed the white side facing inward. There are some inconsistencies on the peg board such as missing holes and double-drilled holes that are larger than normal. I'll check this more carefully next time. Fortunately, neither issue caused any real problems with the marble run.
5. I wasn't sure what to use for the bumpers so I bought 1"x3" (actually it measures 1"x2.5") pine and cut it into 4" lengths.
— Tatian Greenleaf

 RSS Feed
